One of Venture Event Manager’s bet features is how it handles events with multiple occurrences. There isn’t a WordPress event manager available that handles the task so elegantly and with so many options.
Inside every event admin panel, you’ll find the “Event Dates” metabox, which is where all of the occurrence management magic happens.
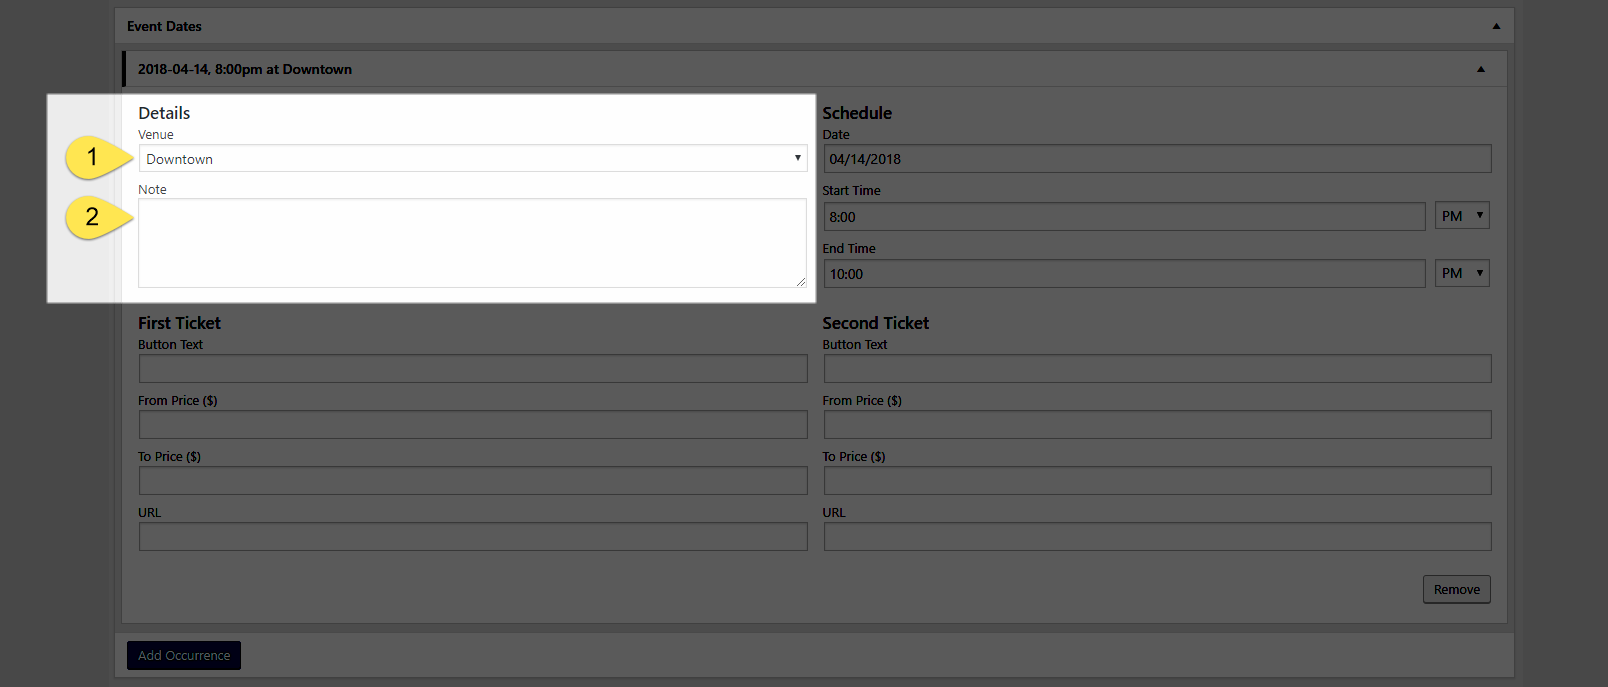
DETAILS
- Venue (required): Dropdown items are populated by the venues you add via the “Venues” taxonomy.
- Note (optional): This is a text only field where you can enter information exclusively related to that occurrence.
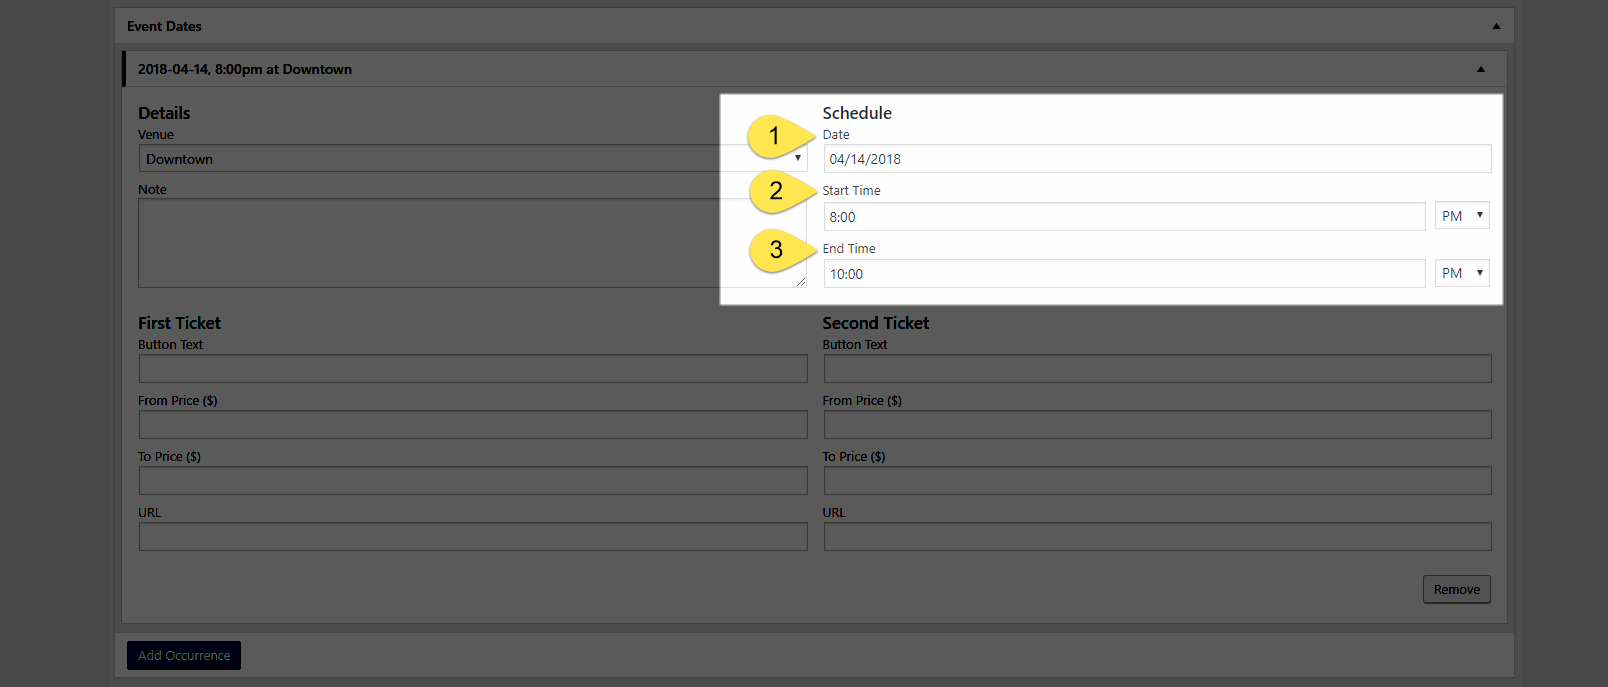
SCHEDULE
- Date (required): enter directly using MM/DD/YYYY format or select via popup date picker.
- Start Time (required): don’t forget to select AM or PM.
- End Time (required): you do not necessarily need a firm end time plus you can set the frontend to include/exclude as a universal setting.. By default, the system will set it to two hours after the start time. The value is required by Google and Apple calendar platforms. Don’t forget to select AM or PM.

TICKET FIELDS
The ticket fields are entirely optional and one of VEM’s most unique features is you can input mutually exclusive ticket info for two separate purchase buttons/links. It’s a great option if you have standard and VIP pricing, single ticket or subscription/membership sales and any other instance where having dual ticket CTAs will be useful.
- Button Text (First and Second Ticket):required if using ticket purchase links/buttons, optional if not. This is freeform text and will be applied to that individual occurrence.
- From Price (First and Second Ticket): There are several options for how you can display pricing on the frontend. The “Ticket Pricing Options” cheat-sheet is located in the “Help” tab in the top, right corner of the screen. It provides everything you need in order to generate the desired frontend display.
- From Price (First and Second Ticket): There are several options for how you can display pricing on the frontend. The “Ticket Pricing Options” cheat-sheet is located in the “Help” tab in the top, right corner of the screen. It provides everything you need in order to generate the desired frontend display.
- URL (First and Second Ticket): required in order for the ticket links/buttons to show on the frontend. If you do not enter a URL, none of your purchase ticket links/buttons will show on the frontend, even if you have values entered into the ticket price fields.
ADD/REMOVE OCCURRENCE
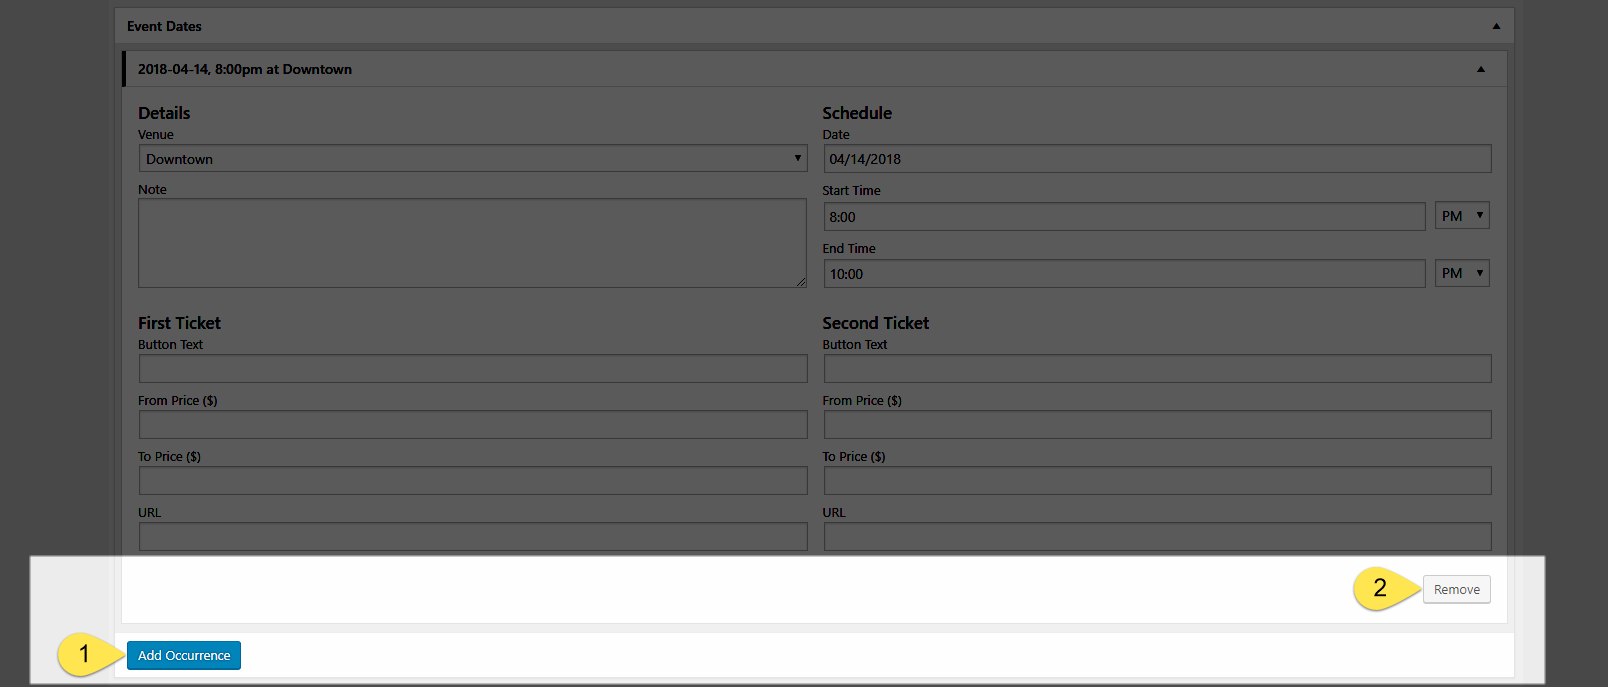
This is where VEM’s simplicity is also it’s genius. If you have more than one occurrence for an event, simply select the “Add Occurrence” button and the system will duplicate all of the values from the most recently added occurrence. All you need to do is edit the respective details and save.
You can rinse and repeat this as many times as needed. Add multiple occurrences per day, set them up at regularly recurring intervals, or have them take place on completely random schedules.
There are no limits!
- Add Occurrence button
- Remove Occurrence button
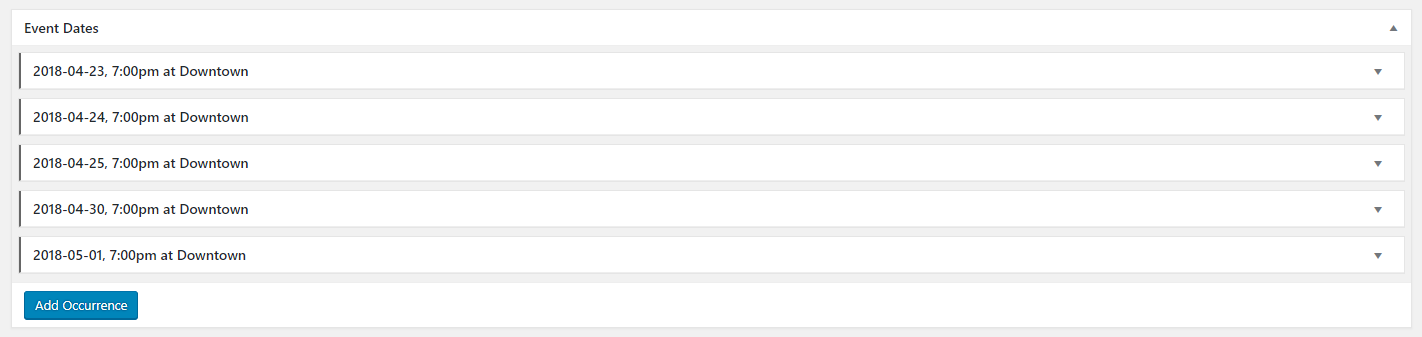
VEM will automatically group them in chronological order based on their date and start time (and include the venue name for an even easier time visually identifying them):
If you have events with lots and lots of occurrences, we recommend making your life easier and picking up a copy of the Occurrence CSV Importer Add-on.
It allows you to mass import data for hundreds, even thousands, of event occurrences across one or multiple events from a single csv file.