Categories are a required taxonomy for all events. They are used to help you group similar types of events as well as providing a way to filter their display in/out of event calendars and listings.
- Name: Keep in mind, this will show on the frontend to site visitors.
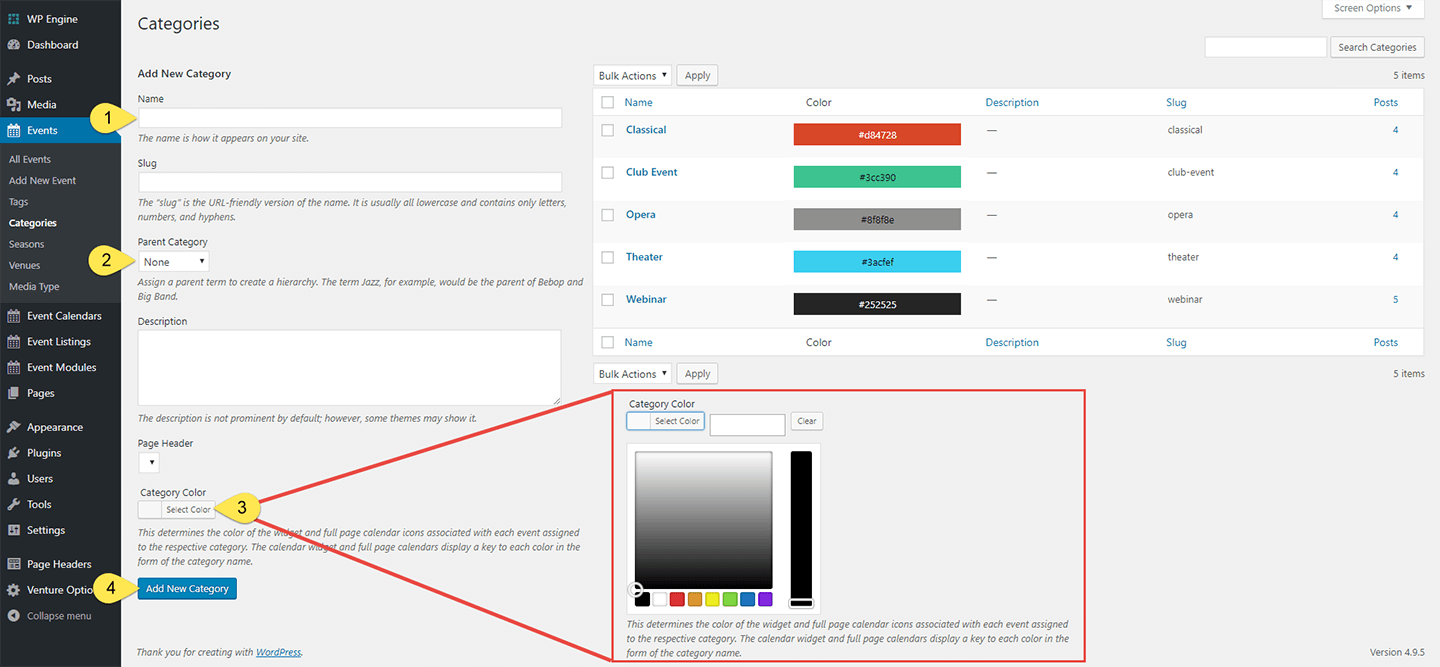
- Parent Category: Assign a parent term to create a hierarchy. This is especially handy when creating rules for filtering events from certain categories in/out of lists and calendars. In calendars, you can even select which category color to use on frontend displays.
- Category Color: optional but recommended. Assign a category color via Hex Code. These colors will be used on the frontend to help visually distinguish categories in calendars and calendar keys so be sure to select colors that not only match your branding but provide enough contrast that users can easily distinguish one from another within the calendar. The system will provide a color picker if you do not already know the six-digit hex code.
- Add New Category: The category will now appear as a selectable option in the “category” metabox inside each single event admin panel. If you’ve assigned a color, you’ll see it displayed in the list of categories on the “Categories” admin panel.
Note: we do not recommend manually setting the slug, parent, or description settings unless you are an advanced user an are already familiar with how they work inside WordPress.
To edit a category, hover over any existing category and click the “Edit” link via the popup sub menu. You may edit the name and color as desired. Any change will automatically push through to any single event page, calendar, listing, or event widget that was currently assigned to that category.