New Functionality
After installing and activating, you will find the following new admin panels and features:
- New Logo admin panel (Events > Logos)
- Edit Logo admin panel
- “Logo” drag and drop module on all single and listing layout settings panels
- New “Logo” metabox on single event admin panels.
Getting Started: Create Logos
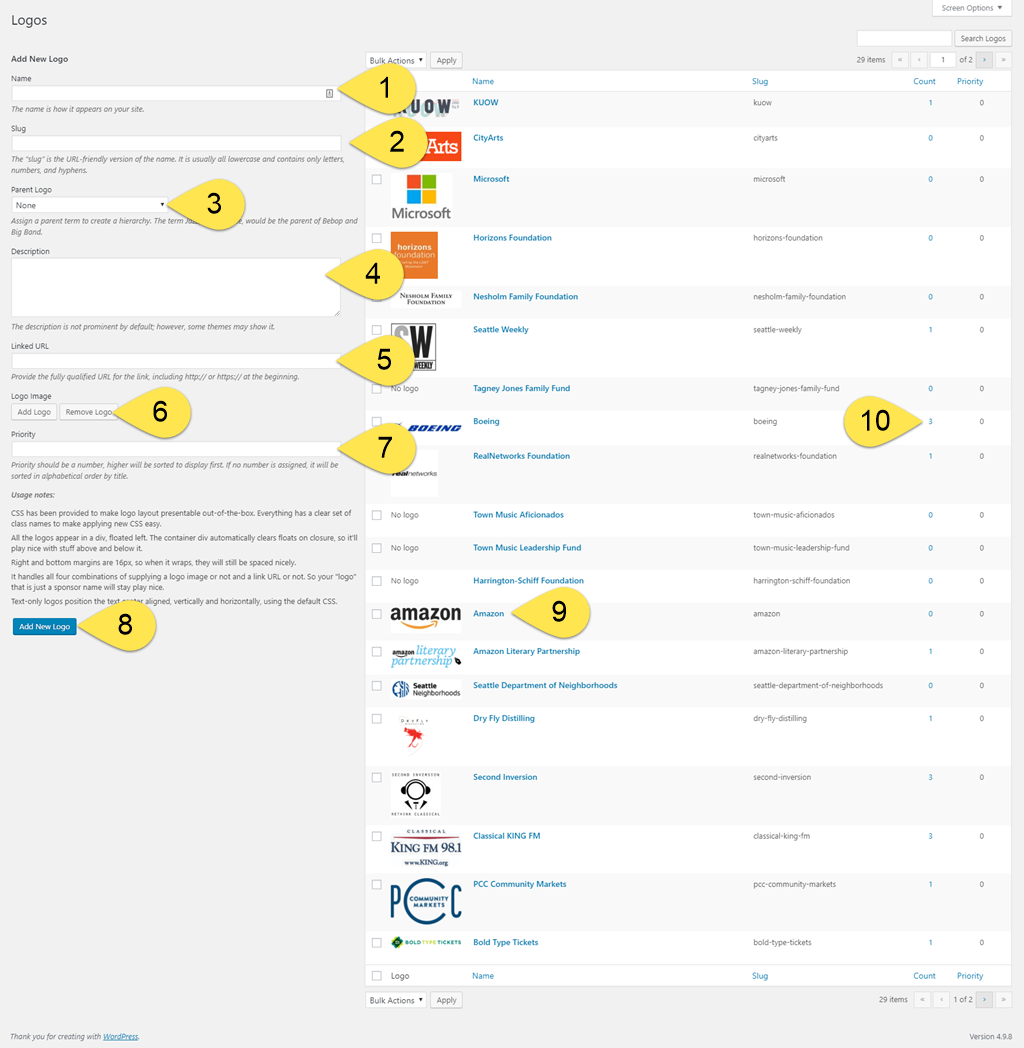
- Name: required.
- For text only logos, this is what the system will display on the frontend.
- Slug: the system will create this automatically. We recommend you do not edit it unless you are an advanced WordPress user.
- Parent Logo: optional.
- Description: optional, for admin purposes only.
- Linked URL: optional. Be sure to include the full URL with https:// or http:// prefix.
- Logo Image: optional. Upload images the same way you would with other image media.
- Priority: optional. Priority should be a number, higher will be sorted to display first. If no number is assigned, it will be sorted in alphabetical order by title.
- Add new logo: select when ready and logo will appear in right column listing.
- Edit existing logos by selecting from the list.
- Pro tip: selecting the usage count number will take you to a filtered list of events that have the respective logo assigned.
Editing Logos
![]()
After selecting a logo to edit from “Events > Logos” admin panel, you can adjust all of the primary values.
Assigning Logos To Events
This is point and click straightforward.
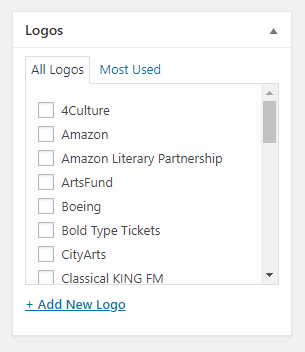
- On the single event admin panel, select the the logos you want to assign from the “Logos” metabox.
- By default, they will appear in alphabetical order based on their name but you can override that using the logo’s “Priority” field.
Inserting Logos Into Single Event Pages and Listings
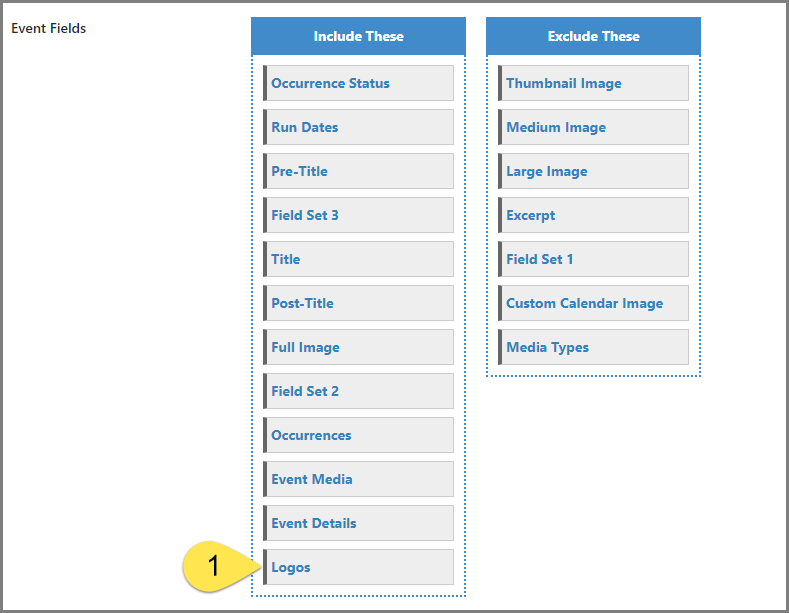
- Drag the “Logos” module into the “Include These” rows in the position you want them to appear.
The new “Logos” module will be available on the following layout settings panels:
- Listings
- Single Page
- Archived Listings (Pro Only)
- Archived Single Page (Pro Only)
- Event Listings (Pro Only)